In my previous tutorial which I
used
Windows Form Databinding in VB.NET to bind data and Customized
BindingNavigator component as I used Buttons instead the default
BindingNavigator component that enable you to Add, Delete, Update, Retrieve,
and Search record.
Actually, it was already done
this program before in VB.NET (see
How to use BindingNavigator in VB.NET). As a
challenge, I migrate
VB.NET to
C – Sharp (C#) to do this job where in the functions
can perform to Add, Delete, Update, Retrieve, and Search record, and most
probably all functions and design are almost identical in my
previous tutorials. In fact, the code in C# not too far from the code of VB.NET. However, there are some lines of code that
you need to understand it well because of some instances. Let say, to
Startup
Form. Usually, in VB.NET, we go to
Project Menu –
Windows Application
Properties – and set Startup Form which form will be loaded first. In
C#, to
set the
Startup Form you need to double click the
Program.cs on your
Solution Explorer. This code generated looks like this:
static void
Main()
{
Application.EnableVisualStyles();
Application.SetCompatibleTextRenderingDefault(false);
Application.Run(new frmHome());
}
To change the Startup Form, you
only change frmHome name in which Form you want to load first. Note, the
default name of every forms are Form1, Form2, Formn every time you add new Windows Form. It’s
better to change the name of every Forms to make it readable and meaningful.
The experience I had while using
C# is how to show Form. Before, I can’t find a solution how to work it because
in VB is very simple to show Form. This is how:
Form frm = new frmAdd();
frm.ShowDialog();
You cannot do (Form1.ShowDialog())
like VB to show form. Instead, initialize first to enable to show other forms.
Those are among few line of codes
might take to remember while working in C# if you are VB.NET programmers expertise.
Now, let’s explore the source
code:
Code for Add New Entry:
private void btnsave_Click_1(object
sender, EventArgs e)
{
this.Validate();
this.tblinfoBindingSource.EndEdit();
this.tblinfoTableAdapter.Update(this.dbInfoDataSet.tblinfo);
MessageBox.Show("New Records has been successfully saved",
"Save Record",
MessageBoxButtons.OK,
MessageBoxIcon.Information);
this.tblinfoBindingSource.AddNew();
}
Code for Update Records:
private void btnupdate_Click(object
sender, EventArgs e)
{
this.Validate();
this.tblinfoBindingSource.EndEdit();
this.tblinfoTableAdapter.Update(this.dbInfoDataSet.tblinfo);
MessageBox.Show("Records has been successfully updated",
"Update Records",
MessageBoxButtons.OK, MessageBoxIcon.Information);
}
The code for Add and Update works
in the same way as you have noticed.
Code for Delete Records:
private void btndelete_Click(object
sender, EventArgs e)
{
int x;
string
fname;
string
lname;
x = this.tblinfoDataGridView.Rows.IndexOf(this.tblinfoDataGridView.CurrentRow);
fname = this.tblinfoDataGridView.Rows[x].Cells[0].Value.ToString();
lname = this.tblinfoDataGridView.Rows[x].Cells[1].Value.ToString();
if (MessageBox.Show("You
want to delete" + fname + " "
+ lname + " records?", "Confirm
Entry", MessageBoxButtons.YesNo, MessageBoxIcon.Question)
==
System.Windows.Forms.DialogResult.Yes)
{
this.tblinfoBindingSource.RemoveAt(this.tblinfoBindingSource.Position);
this.tblinfoTableAdapter.Update(this.dbInfoDataSet.tblinfo);
MessageBox.Show(fname
+ " " + lname + " " + "record
has been successfully deleted");
}
else
{
MessageBox.Show("Cancelled","Cancelled
Entry",MessageBoxButtons.OK,MessageBoxIcon.Exclamation);
}
}
Code for Retrieve Records:
this.tblinfoTableAdapter.Fill(this.dbInfoDataSet.tblinfo);
Code for Search Records:
private void txtsearch_TextChanged(object
sender, EventArgs e)
{
this.tblinfoBindingSource.Filter
= "Firstname LIKE '%"
+txtsearch.Text + "%' OR Lastname
LIKE
'%" + txtsearch.Text + "%'";
}
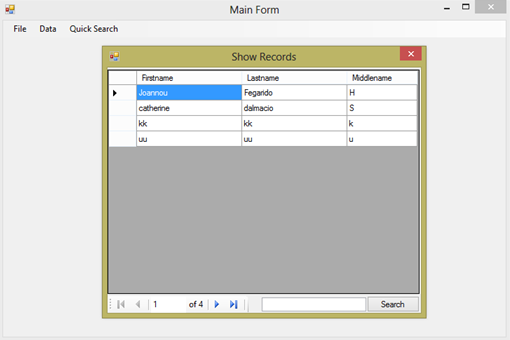
The screenshots are almost
identical in my
previous article. Download this source code
here.
If you want to save more files online and share it to your friends, sign up for free.


.jpg)


